Creative drawing for children. non-traditional techniques.
by 14.11.2015 09:24 73 260 views 2
Let's talk today about non-traditional ways to captivate a child with paint and the drawing process. As practice shows, the later the child picks up a brush or felt-tip pens, the better. So, to your attention a selection of creative ideas for drawing from the site knigorez.ru
1. Drawing on ice - Ice salt painting.
A very fun and educational process. A great idea is to use salt along with the paints, the latter corrodes the ice and bizarre grooves form on its surface and a different rough texture forms. The paint can penetrate inside, creating an interesting pattern.
In order for the ice to be transparent, you need to freeze boiled water, otherwise the sculpture will be matte.
As for paints, it is better to give preference to watercolor, it penetrates ice more easily. Gouache is too dense, although it can be diluted to the desired consistency and poured over your ice creation.
2. Drawing with ice itself
On the foreign Internet, he surfs for the queries “ice cube painting” or “Ice Cube Tie Dye”.
In this case, the painted ice will act as a drawing tool. You'll also have to prepare yourself by pouring the water that has been stained with paint or food coloring into ice cube trays and freezing them. We recommend inserting an ice cream stick or a toothpick into each piece. Freeze these cubes in the freezer.
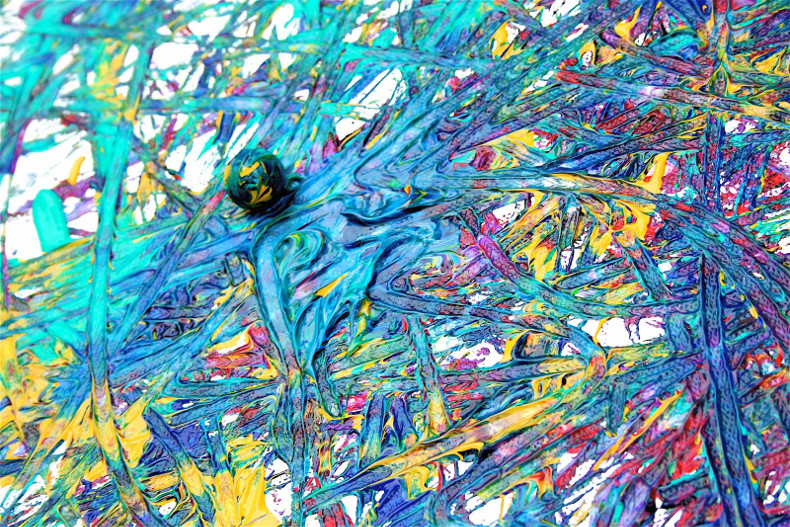
3. Marble Painting - painting with glass marbles
Another interesting non-traditional drawing technique for kids is the use of marbles.
It is convenient to roll them in a lid from under a cardboard shoe box, or you can simply take any container and attach paper inside with double-sided tape.
It turns out very bright and rich work. You can safely visit the museum of avant-garde artists! 🙂
4. Drawing on foil
Drawing on foil is very different from paper. Firstly, you can clearly see how the colors mix, and secondly, the paint glides perfectly. Suitable for sensory development in toddlers.
You can draw with your fingers, brushes, cotton swabs, etc.
5. Drawing on paper coated with wax, paraffin or soap.
We apply the main drawing on white paper with wax crayons, a paraffin candle or a piece of dry soap. And then you need to dilute a little gouache or watercolor in water, you should get a little tinted water and start watering or paint over the entire sheet with a thick brush.
As a result, the drawing is not painted over with wax, but, as it were, appears over a colored background.
6. Monotype and photocopies.
Initially, the drawing is done on a piece of glass, film, plastic, mirror. A sheet of paper is placed on top and pressed against the surface. The result is a mirror image. Always only one.
You can also paint only half of the leaflet, fold it in half and press firmly. The drawing will be mirrored on the second half, it is easy for children to demonstrate the effect on the image of a butterfly or a tree.
7. Stamps
For interesting prints, you can color autumn leaves or vegetables cut in half. We press the base to the paper and get an interesting pattern.
You can cut a figure out of almost any vegetable, but natural traces, for example, from onions or Beijing cabbage, look much more profitable.
8. Drawing with toothpicks on PVA glue.
Pour PVA glue onto the paper and draw stains on it with toothpicks or cotton swabs.
As a base, you can also use blots of thick paint of a different color. But it's much more expensive.
If you use a transparent plastic cover as a base, for example, from under sour cream, then after the pattern dries, you can cut out, for example, a heart from it and hang it on a Christmas tree on a string.
9. Glue to create a 3D effect.
Very interesting drawings of a different plan are obtained with PVA glue. It or hot glue can be used to give the pattern volume and relief.
10. Drawing with a toothbrush
It can be used both directly to draw, and to spray paint with it to give the desired effect.
11. Bubble wrap painting.
Drawing ON bubble wrap and then printing the drawing, or drawing with the film itself.
12. Volumetric drawing with puffy paints.
A ready-made version of paints is on sale - puffy paint. However, it is quite possible to make them at home yourself: you need water, dye, flour, soda or baking powder. The proportions will have to be selected, because it all depends on the paint used.
The finished drawing must be baked in the microwave for 30 seconds.
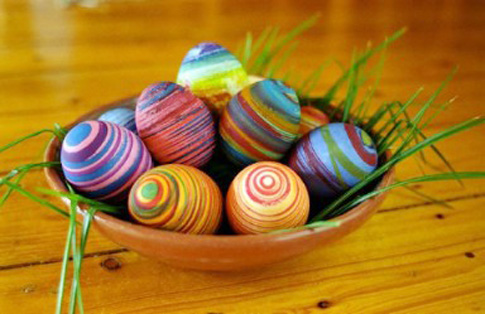
13. Drawing on salt
We apply the drawing with PVA glue, sprinkle with salt and let dry. Then, with the help of a brush, we pick up the paint and drip it onto the salt base. The paint itself spreads and mixes beautifully.
How do you draw? Share your great ideas with us in the comments!
Polina Morozova, the article was prepared specifically for the site knigorez.ru.


Xenia 04.10.2016 at 05:44
Very interesting ideas? I will definitely use in my work
Marina Skornyakova 03/20/2017 at 15:07
Drawing with colored glue. Gouache of the desired shades is added to small tubes with PVA glue, stirred until a homogeneous consistency. The pattern is obtained by squeezing colored glue out of the hole in the cap of the tube. The image is voluminous both in the wet state and when dried. It is convenient to use when drawing a contour.