Fork photo and card holder
by 11.10.2012 18:35 7 313 views 0
Everyone knows the standard purpose of forks, however, how many different things can be made from this seemingly simple material. One option is a fork photo holder.
Materials:
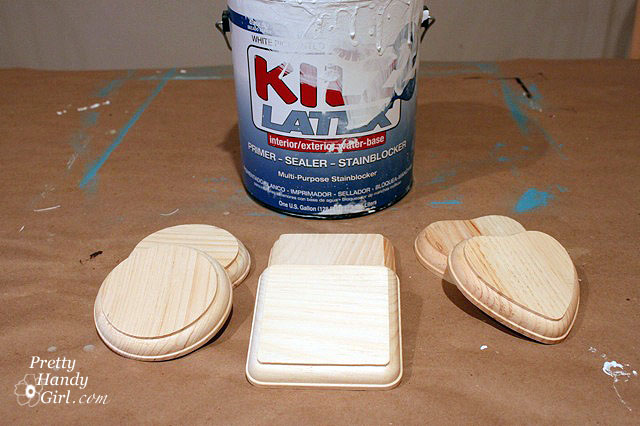
1) Plug (one or more depending on the model).
2) Wooden base (you can buy it at a craft store or make it yourself).
3) Beads, corks for wine or other little things that will serve as a decoration.
4) Scrapbooking paper, felt flap.
5) Multipurpose wire, wire.
6) Nippers, pliers with a sharp nose.
7) Glue, decoupage glue.
8) Drill (drill depending on the thickness of the wire).
Step-by-step instruction:
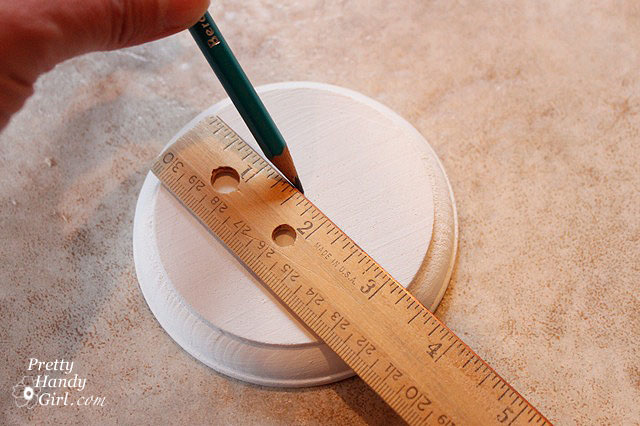
We are looking for, buying or making a wooden base with our own hands. If you process the tree manually, this, of course, will require more time and effort. At this stage, you determine the shape of the stand (circle, square, heart). When the shape is decided, it is necessary to mark the center of the wooden stand. To do this, just take a ruler and a pencil. Most likely, this does not require further explanation.
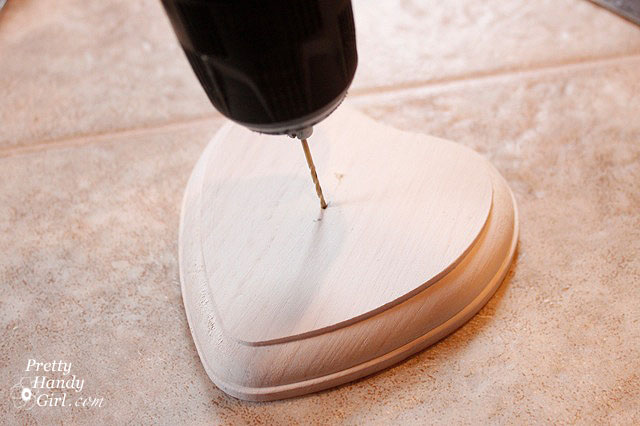
We proceed to drilling a hole in the place that was designated as the center. This is where a drill comes in handy. The drill must pass through. Be careful as you may hit the surface you are working on.
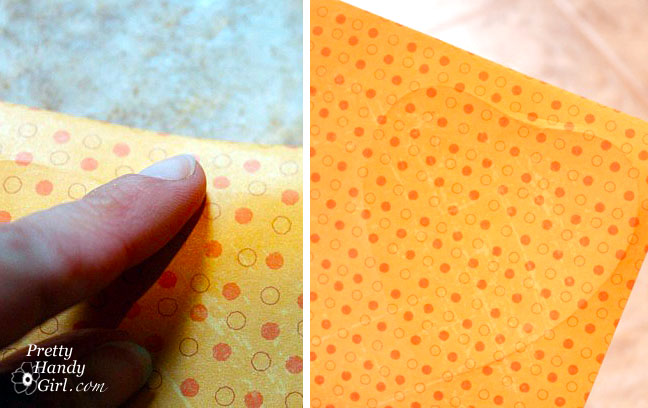
We are preparing a pattern from scrapbooking paper, it will decorate the stand. This task can be facilitated by simply transferring the shape of the product onto paper. Press firmly and circle. It remains only to cut.
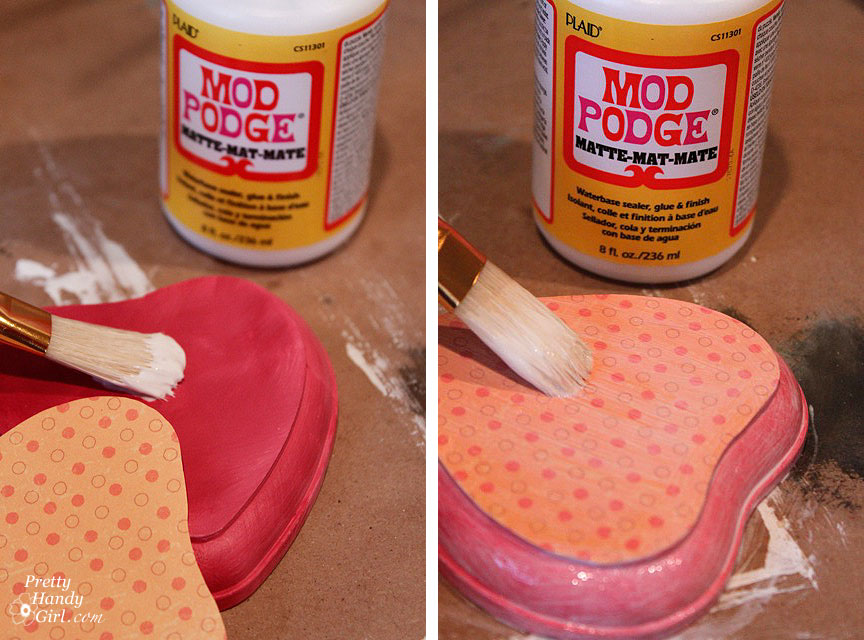
Now the stand can be painted, give it color. Stick on paper pattern. You can use Mod Podge matte decoupage glue.
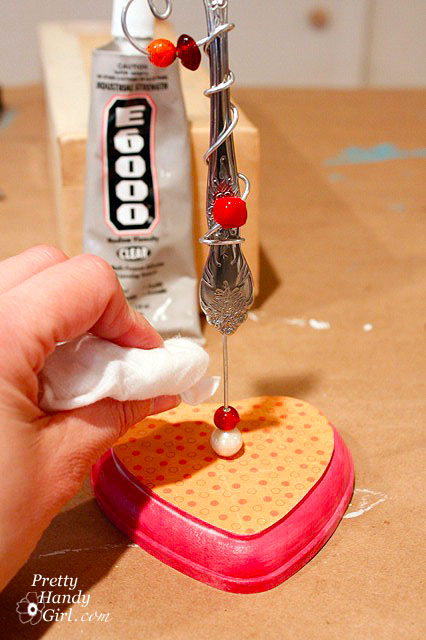
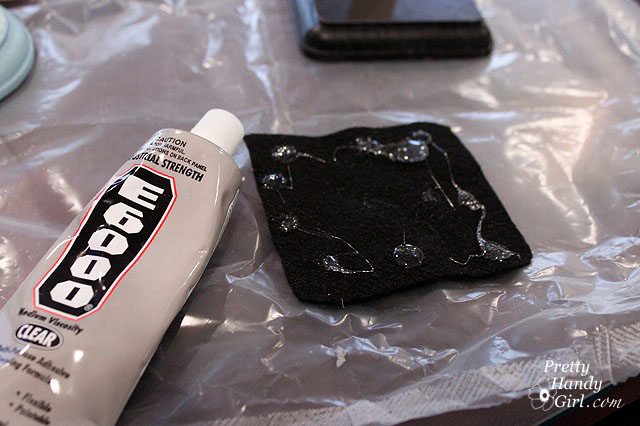
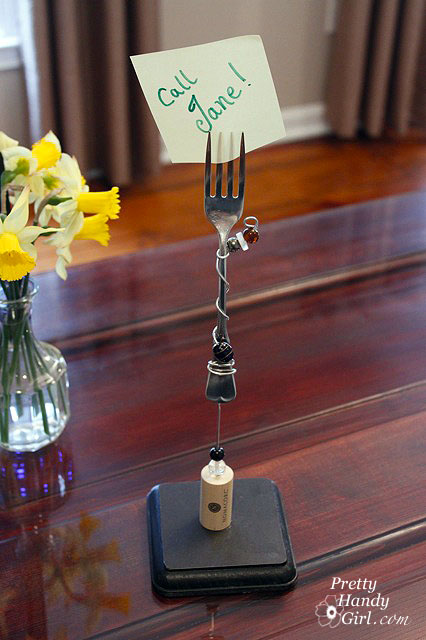
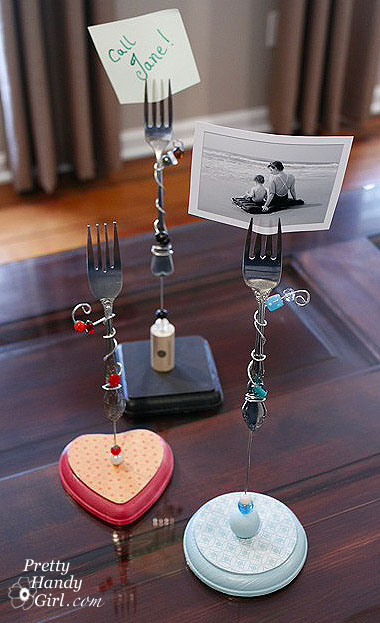
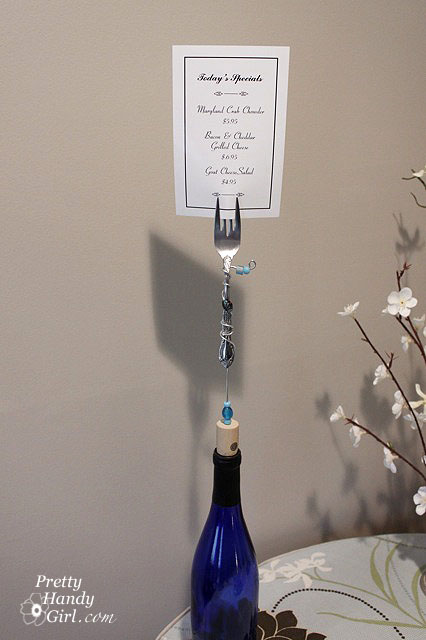
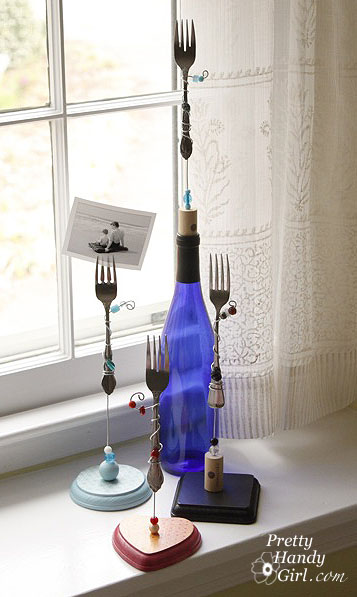
Wrap the fork with wire of your choice. Thread beads onto it from the side where the wire will be in contact with the stand. In addition to beads, you can use wine corks, beads and any other little things that will not only decorate the product, but add a certain charm to it and maybe even themes and style. Then dip the end of the wire into the glue.
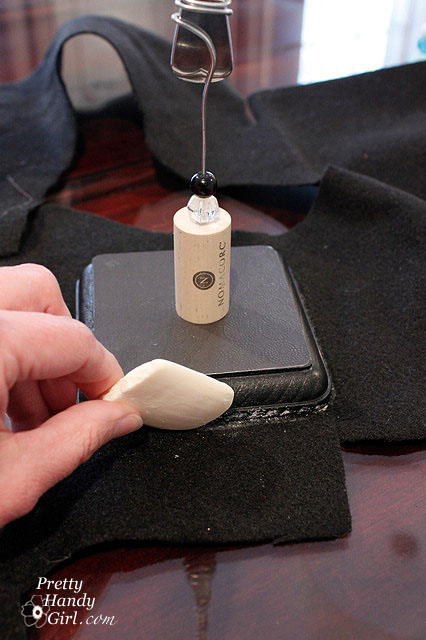
After inserting the wire into the stand, watch how the glue spreads. Remove excess glue. In addition, do not forget to protect the working area from glue, an ordinary newspaper or oilcloth will do. We are preparing a pattern for the bottom of felt. We circle the stand with a soap bar.
Apply glue and press. Let dry.
And now the stand is ready! An ordinary fork in a new guise will save a reminder, a favorite photo, an emergency message and more. This is a wonderful holder that can be placed both at home and in a cafe, restaurant, as a reminder of the dish of the day or a sweet wish "Bon appetit!".
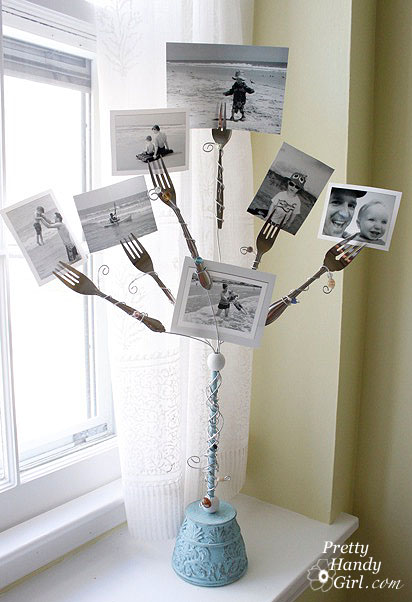
As a stand, you can use not only a wooden block, but even a wine bottle! You can even make a whole tree out of forks!
You just have to come up with a few more options for using such an original fork stand.
Site materials www.prettyhandygirl.com


