We sew a reusable calendar from buttons
by 22.09.2012 08:23 6 034 views 0
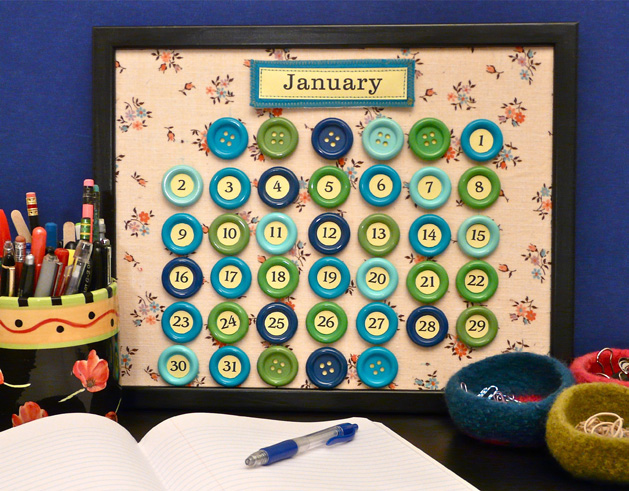
The calendar is an important detail of your table or room interior. We recommend making a “reusable” calendar that you can use all the time: just move the location of the numbers on the scoreboard every month, and also change the name of the month!
Materials:
- Photo frame 11 × 14 or 16 × 20, - a sheet of plywood or thin board, even thick cardboard will do, - a ruler, - a clerical knife, - a piece of woven fabric 24 × 30, - Velcro fasteners, - adhesive tape, - scissors, - 42 large buttons, - 42 flat-head buttons, - 5 sheets of paper (can be colored) for printing numbers and plates with the names of the months, - an electronic template with numbers for the calendar and the name of the months, - glue, - a water-soluble marker for drawing on fabric, - 2 pieces of wool, - a sewing machine and thread, - an envelope.
Please note that measurements are approximate and you may choose other buttons or a frame for the base. The main rule here is that the frame should be seven rows wide, and a minimum of six rows high, as you need to leave room for the name of the month.
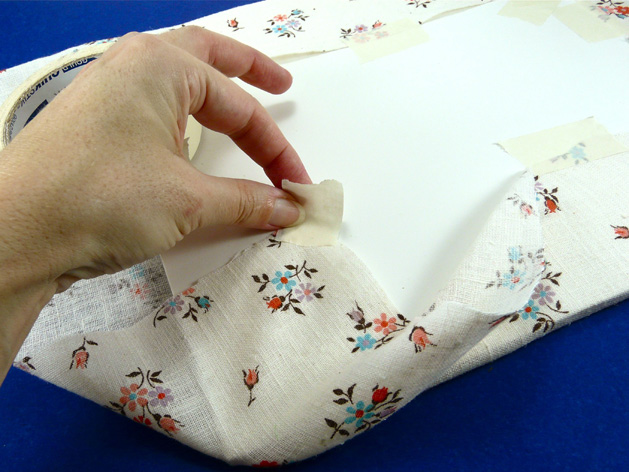
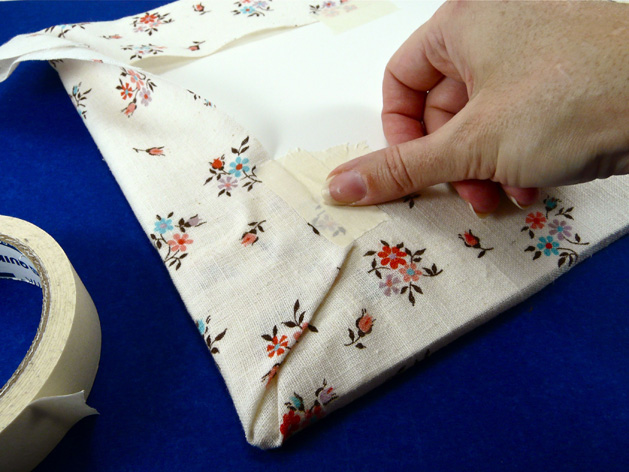
Step 1:
Prepare a wooden base, it will serve as a background. That is, you should reduce the board to the size of our frame, and then wrap it with a cloth. Use adhesive tape to secure the fabric. Fasten on the back side and cut off the excess. Please note that the surface should be as smooth as possible.
Step 2:
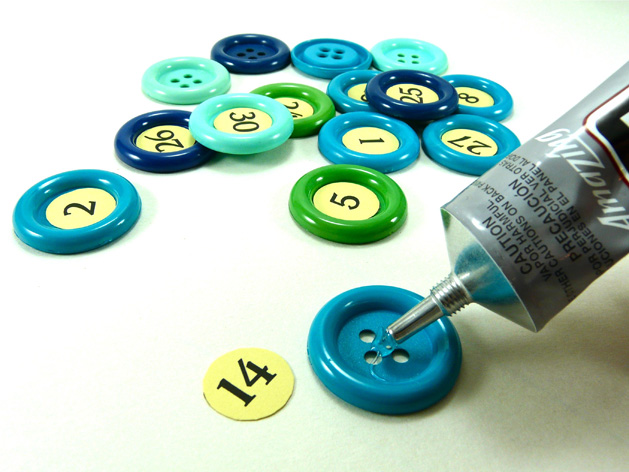
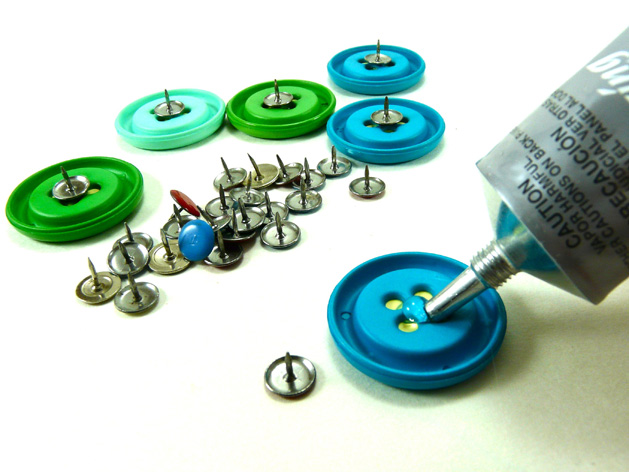
Print all the dates on the calendar. Next, take scissors and cut out the numbers according to the size of the buttons. In this case, the buttons are round, so the numbers are in circles. Print the numbers in a circle, then cut out to get a neat button core.
Connect the rounds with buttons with glue. You will have 11 buttons left. We leave them blank, and they will be used as seat holders.
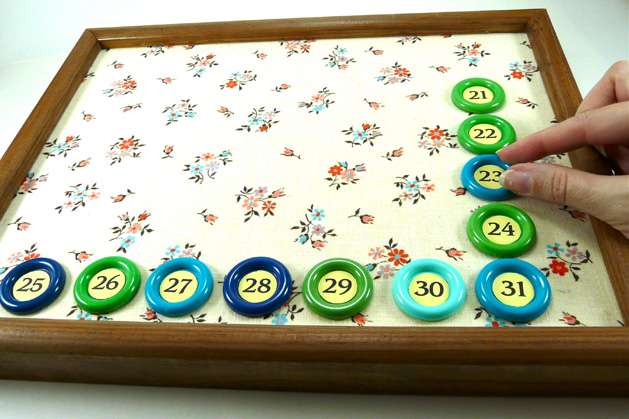
While the glue dries, lay out the buttons in six rows of seven buttons each, similar to the one shown in the photo below. Don't forget to leave space at the top for the name of the month.
Step 3:
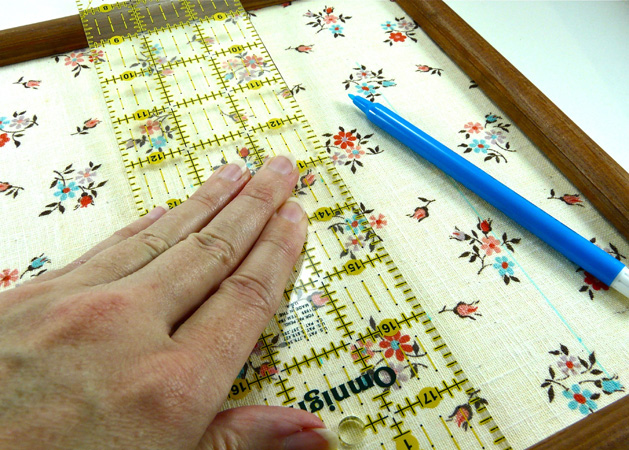
Once you have both rows of buttons, use a water-soluble marker to mark the fabric. The main task is to create a grid that will become the basis of the calendar. Thanks to this grid, it will be even.
Draw a line along the bottom row of buttons and make a mark at the base of the center of each button. Make marks on the right side of the column, marking the center of the buttons. Remove buttons. Based on the marks you made earlier, draw seven vertical lines in a row across the fabric. Use a wide ruler to keep your line straight.
Now, take your measurements off and grab some glue to glue the buttons to the back of each button. Let the glue dry for a few hours before you touch the buttons again.
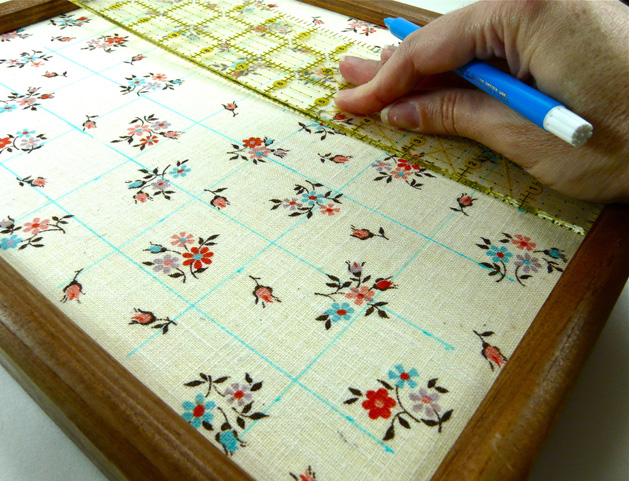
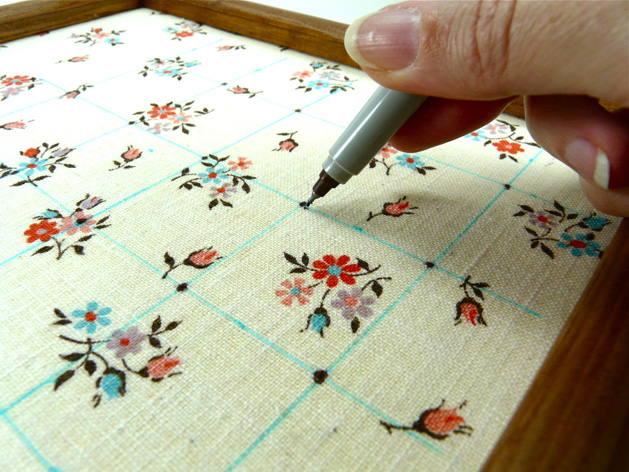
Step 4: In the meantime, draw horizontal lines on the calendar using the marks you made along the right side. With the ruler, draw six horizontal lines in a row across the entire calendar. Put a dot with a marker at each place where the lines intersect. These dots will guide you as you start adding buttons to your calendar.
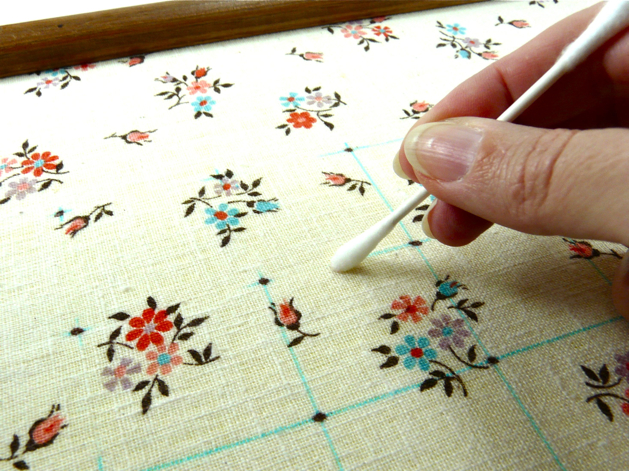
Step 5:
Now it's time to get rid of the lines with a moistened Q-tip or paper towel.
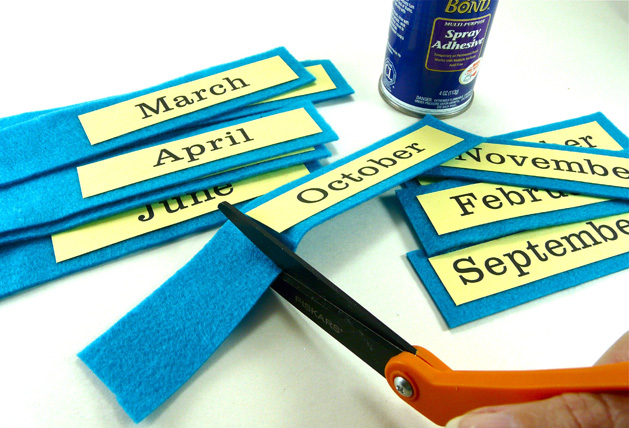
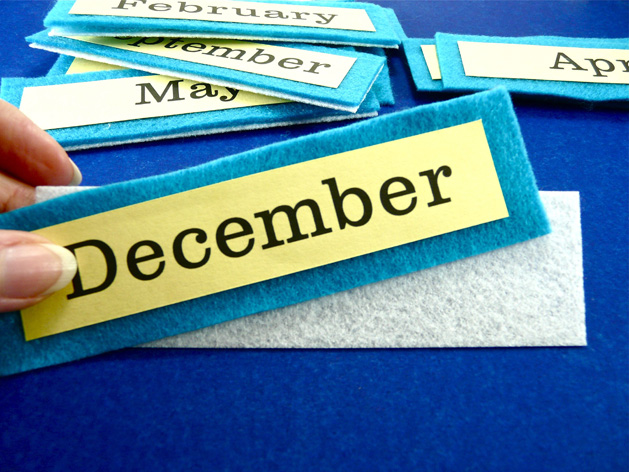
We proceed to the plates with the names of the months of the year. Print on paper and use glue to connect with fabric strips so that they do not move. Cut off the excess.
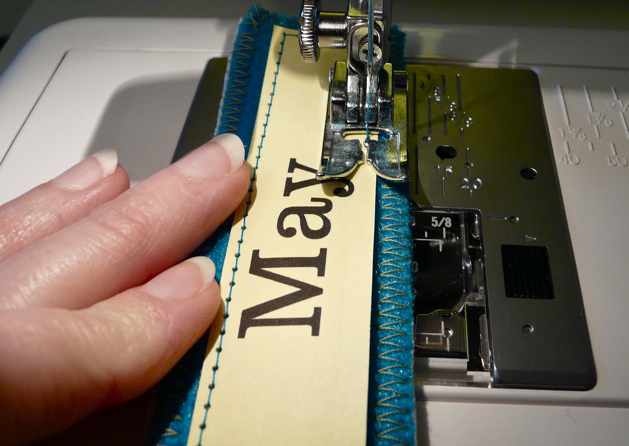
Step 6:
Next, on the sewing machine, connect these two layers, make stitches from all four edges. Repeat this process for the remaining 11 month tablets.
Step 7:
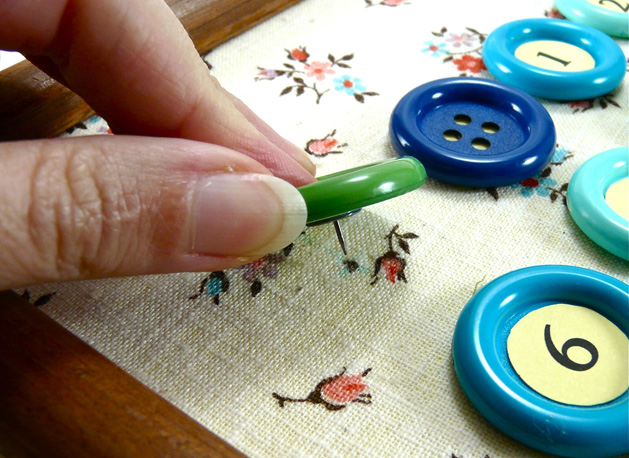
Start compiling a calendar according to the selected month. Insert buttons with buttons at the marked points, lining up the numbers according to the month.
To attach a sign with the name of the month, use Velcro. Fix them with glue.
Step 8:
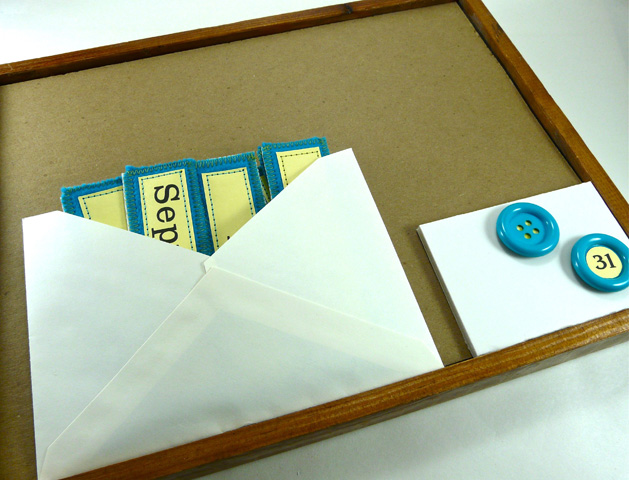
Here is the calendar! To store spare parts, you can glue an envelope on the back.
The calendar can be placed on a table leaning against the wall, or you can add a wall hanger and hang it on a stud.
The idea and development of such an original calendar belongs to Diana Gilleland. Content taken from her blog .
The article was translated specifically for the site knigorez.ru.


